The Groups feature allows users to create custom groups, whether that be groups of individual users and/or clinics.
Creating a new Group creates a new aggregate, that can be used in many ways, including:
- Peer-led learning communities across multiple clinics or individuals
- Local quality improvement projects
- Collaborative initiatives with PCN teams or Division staff
- Shared learning and benchmarking opportunities among colleagues
To learn more about Groups and what it means to be invited to one, see: You’ve Been Invited
Create a Group
Follow these steps to create a new group:
- Click on Groups from the navigation menu
- Navigate to either the Individuals or Organizations tab. Please note that you need to have permissions to create an organization group
- Select Create Group
- Enter:
- A group name
- A short group description, with enough information to ensure the people you invite will understand the purpose of the group they are being invited to contribute to
- The desired visibility setting (Public or Private). Public groups can be used as a data source by HDC user, while Private groups are only available as a data source to group members.
- Invite at least one individual or organization to join the group. You can invite multiple members at the same time.
- Select Create to create the group.
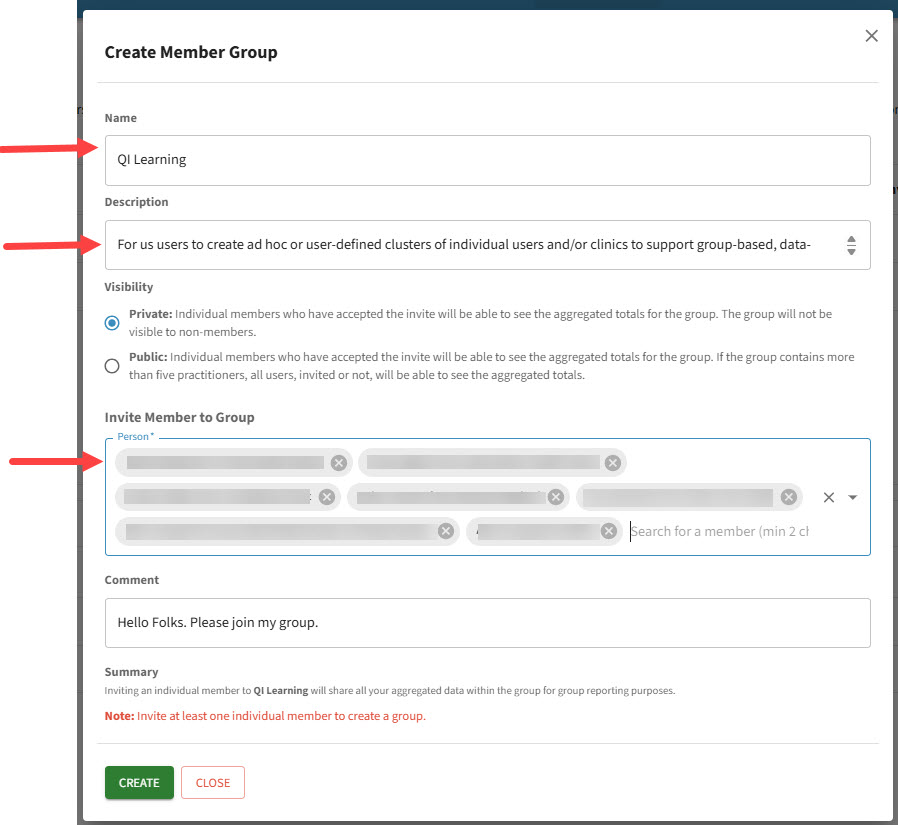
Once a group is created, additional members can be invited at any time. Invited individuals and clinics can choose to accept or decline the invitation.
Manage your Groups
The Groups section helps you keep track of both your active memberships and pending requests.
The Active Groups tab displays all groups you currently participate in, including groups where your data contributes to the group’s aggregate results. Any groups you create will also appear in this list.
From this section, you can:
- View all your active groups
- Access group settings and member information
- Leave a group when you no longer wish to participate

Managing your Group Members
To manage members within your group, select the group name from the Active Groups tab. This will take you to the Group Settings page, where you can view and manage group details and membership.
From the Group Settings page, you can:
- View all group information, including the group’s name, description, and visibility settings
- See a complete list of group members
- Track which invited members have accepted and are actively contributing data to the group
- Invite additional members by selecting Invite Members
- Identify members whose invitations are still pending under the Invited status
- View members who have left the group
You can also manage membership by using the Action menu:
- Select Remove to remove an active member from the group
- Select Cancel to withdraw an outstanding invitation that has not yet been accepted or declined
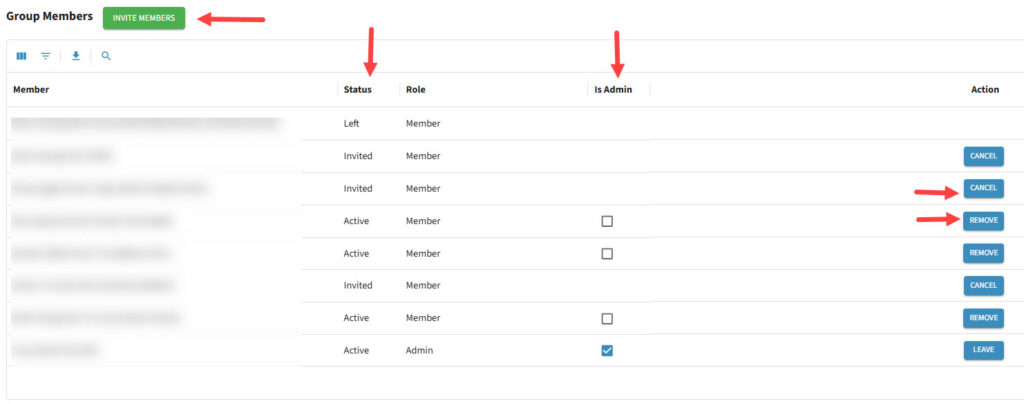
If you choose to leave a group you created, you must first assign another member as the group admin by using the is Admin feature. This ensures the group continues to have someone responsible for managing members and settings.
Updating Group Settings
The Group Settings page is also where you can update group details, including:
- Group name
- Group description
- Visibility settings
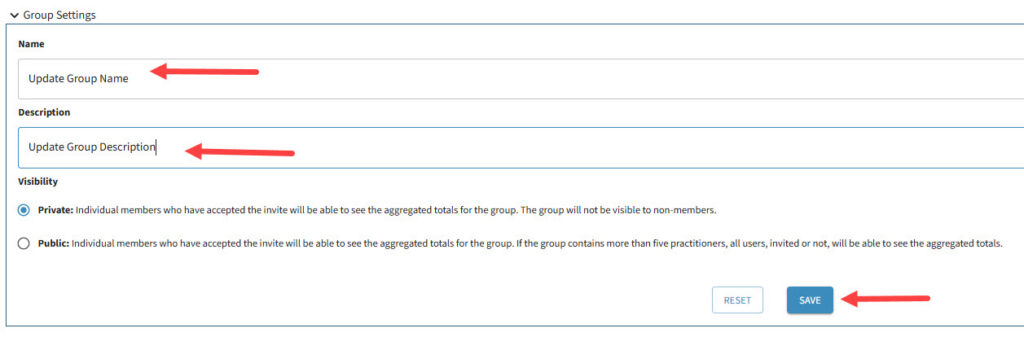
This makes it easy to keep your group information current as your collaboration evolves.